Would you like Hector to keep track of when each of your assets falls out of warranty, remind you before the deadline, and let you report on what’s still covered?
The Warranty field, available on Categories, Subcategories, and Assets, lets you do exactly that. This guide explains why you might use it, where to configure it, and all the places the information can be viewed, updated, and reported on.
Why track warranty dates in Hector?
Most equipment is sold with a manufacturer or supplier warranty that covers repairs or replacement for a limited time. Knowing when that coverage ends helps you:
- Avoid paying for repairs that should still be free.
- Plan replacements or extended-warranty purchases before coverage lapses.
- Demonstrate, during an audit, which assets are still covered.
- Receive automatic notifications well before the expiration date.
Once a value is set, Hector treats Warranty like any other date field: it can be filtered, sorted, reported on, exported, imported, batch-edited, and used as a trigger in Automations.
Requirements before starting:
- Have the permission to access the Settings section to configure notifications, default values, and tolerances.
- Have the permission to modify Categories, modify Subcategories, and modify Assets to set warranty values directly on the records.
Step 1: Set a default warranty on a Category
Setting the warranty at the Category level lets every new subcategory and asset created underneath inherit it automatically, so you only enter the value once.
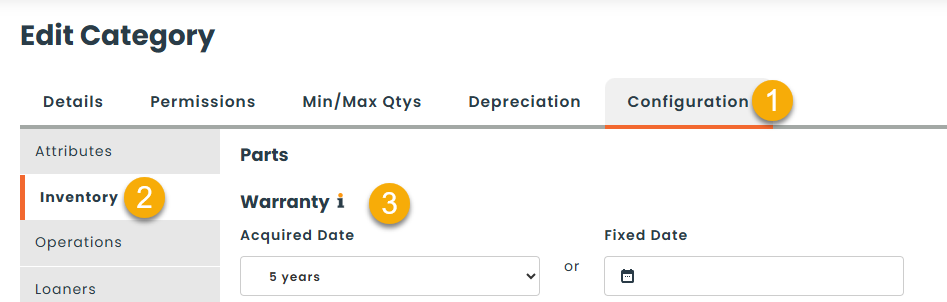
From the Inventory menu, access the Category submenu, click Actions on the category you want to update, then click Edit. Open the Configuration tab, then the Inventory sub-tab.
In the Warranty section, choose one of the following:
- Acquired Date — the warranty lasts a number of years (or months) starting from each asset’s acquisition date. For example, set “3 years” to mean “3 years after the asset was acquired”.
- Fixed Date — every asset under this category shares the same exact warranty end date, regardless of when each one was acquired.
Then click Save.
Note: Setting a warranty here only affects new subcategories and assets created afterwards. To push the change down to existing records, see Step 2.
Step 2: Push the warranty down to existing Subcategories and Assets
When you change the warranty on a Category that already has data under it, Hector does not overwrite existing records automatically. To force-update them:
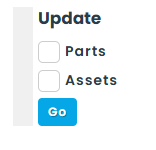
- In the same Warranty section, set the desired value.
- In the Update box, check Subcategories, Assets, or both.
- Click Go.
A confirmation message appears and the update runs in the background. Existing subcategories receive the new warranty value, and existing assets have their Warranty date recalculated.
Step 3: Set or override the warranty on a single Subcategory
From the Inventory menu, access the Subcategory submenu, click Actions, then Edit.
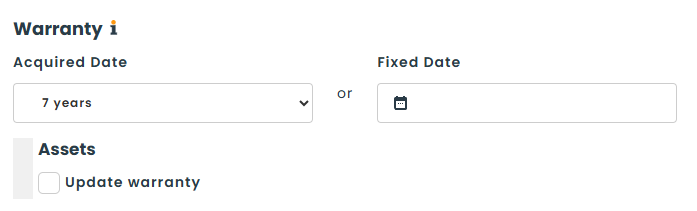
The Warranty field works the same way as on the Category and offers a single checkbox, Update warranty, to apply the change to every asset already attached to this subcategory.
Step 4: Set or check the warranty on an individual Asset
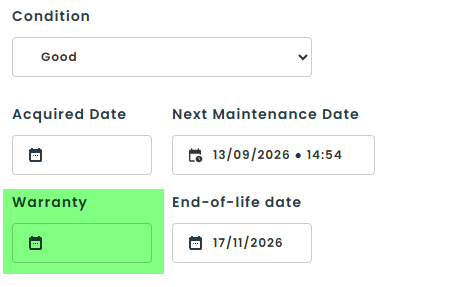
From the Inventory menu, access the Asset submenu and open any asset.
The Warranty field is displayed directly on the asset form. It is automatically filled in based on the parent subcategory’s setting (Acquired Date + delay, or the Fixed Date) but can be overridden on any individual asset by entering a different date.
Step 5: Configure the notification threshold
You decide how far in advance Hector should consider an asset’s warranty “about to expire”.
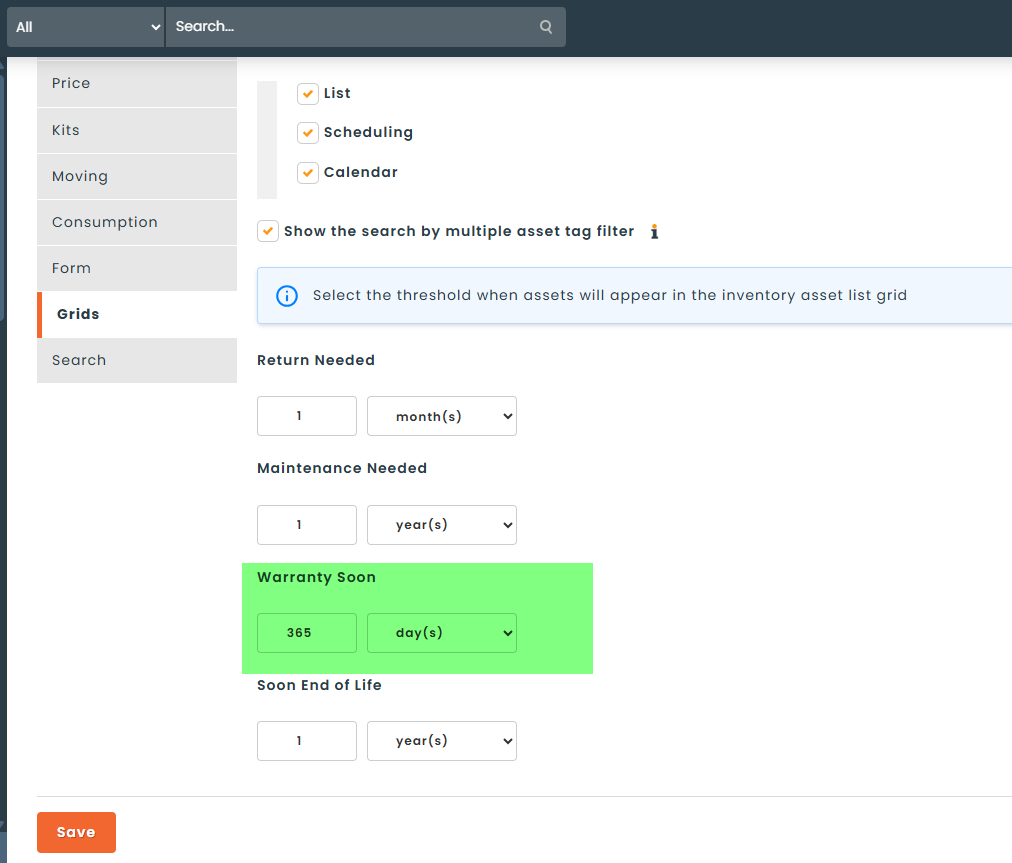
Go to the Settings menu, then Assets. Under the General tab, open the Grids tab and locate Warranty Soon. Enter a number and select a unit (days, months, or years).
This threshold controls which assets appear in:
- The Warranty view in the asset grid.
- The corresponding reports and dashboard tile.
Step 6: Enable warranty notifications
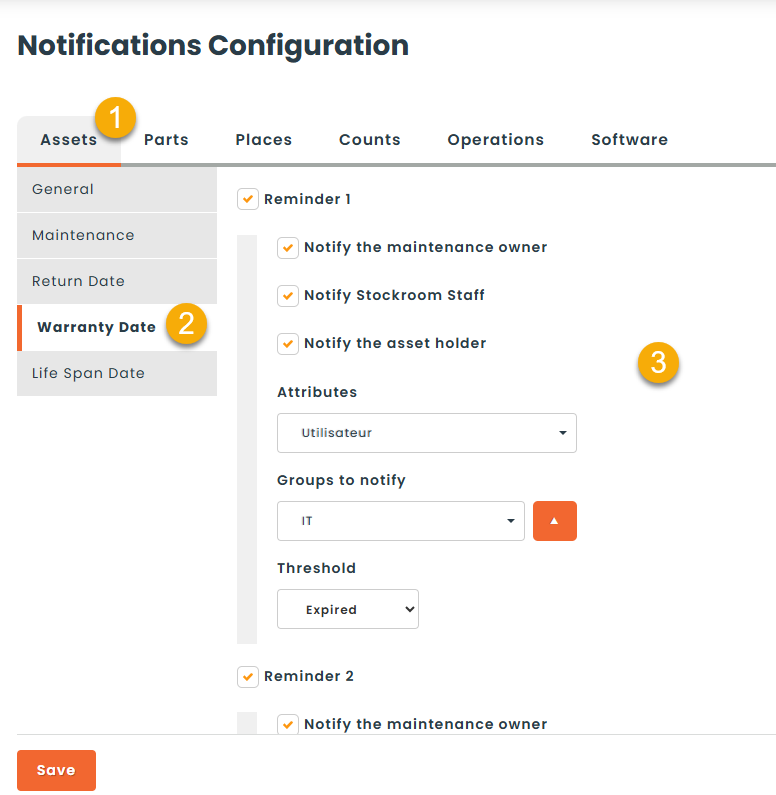
Go to the Settings menu, then Notifications.
Open the Assets tab, then click Warranty Date in the left side menu. Enable the desired Reminders and pick who should be notified (the asset holder, the maintenance contact, the stockroom personnel, or any user group).
Step 7 (optional): Force-update every asset from Subcategory defaults
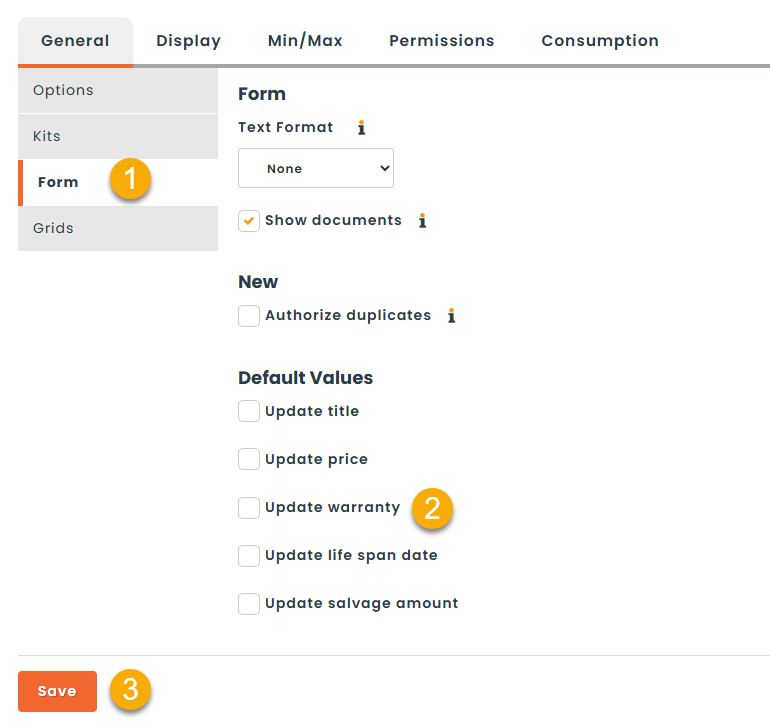
If you change a Subcategory’s warranty and want every existing asset to immediately match (instead of using the per-subcategory checkbox each time), go to Settings, then Subcategory. Under the General tab, open the Form subtab and, under Default Values, check Update warranty, the click Save.
With this setting on, any future warranty change made on a subcategory automatically propagates to all its assets.
Where to view and report on warranty dates
Once the field is in use, the information surfaces in several places throughout Hector:
- Asset grid — Warranty is available as a column. It can be added, sorted, and filtered like any standard column.
- Dedicated asset view — a built-in Warranty view shows only the assets passing the threshold configured in Step 5.
- Dashboard — a new tile displays the count of assets approaching or past their warranty end date.
- Reports — six new built-in reports are available under Reports → Inventory:
- Asset: Warranty Soon
- Asset: Warranty Reached
- Category: Warranty Soon
- Category: Warranty Reached
- Category: Warranty Soon by Stockroom
- Category: Warranty Reached by Stockroom
- Audit / History — every change to the Warranty field is recorded in the History tab of the Asset, Subcategory, with the previous value, new value, user, and date.
How to update warranty dates in bulk
In addition to the Update boxes described above, you can change warranty values for many records at once using:
- Batch Edit — select multiple assets in the grid, choose Batch Edit, and update Warranty in one action.
- Data Import — the Asset and Inventory import templates now include an Warranty column. Existing values are updated when the import is run.
- API — the field is available on the
GET,POST, andPUTendpoints for both Assets and Subcategories. See the API Documentation for details.
How to automate warranty workflows
Open the Automation module to react automatically when a warranty changes or approaches its end:
- Change trigger — fire an automation whenever the Warranty field is modified, or whenever any asset field changes.
- Relative date trigger — fire an automation a chosen number of days, weeks, or months before (or after) an asset’s warranty end date.
- Filter — restrict any automation to assets matching a warranty condition.
- Email templates — the Warranty field is available as a tag and is also included in the general Modification tag.
Permissions
Access to the field can be restricted on a per-role basis under Settings → Roles → Asset modification. Users without the permission still see the field but cannot edit it.