
Pheidix, short for Pheidippides, ran the original marathon race in ancient Greece, and is the inspiration for Hector’s endpoint agent, responsible to gather device information across your organization and sync them back as assets, keeping your inventory up to date.
In this guide, you’ll find out how to setup Pheidix in your environment.
Limitations
- The endpoint agent is available for the following operating systems
- Windows 11
- macOS (coming soon)
- Linux (coming soon)
Deployment Requirements
- Have access to Hector’s Pheidix executable files.
- Have administrative rights in SCCM, Intune or admin rights to create Group Policy Objects.
- Have local system/administrator rights on the endpoints for installation purposes.
- Have permission to deploy the executable on a network share.
- Have permission to authorize the IP address in the firewall.
- Have permission to download and register the app’s certificate.
- Endpoints must have access to the Internet (port 443) to report its status once per day.
Security
- The executable is signed by a certificate to avoid tampering.
- The agent can self update, which allows to modify its HKLM autostart key.
- The agent runs with the least amount of privileges / read only permissions.
- The agent does not make any changes to the operating system or hardware.
- The agent has a settings file for its internal requirements.
Footprint
- The agent is lightweight and runs in efficiency mode to save resources
- CPU usage will be roughly 0% to 1% on typical office devices
- Memory usage will vary between 30 Mb to 40 Mb
- Disk usage is 300 Mb
Getting Started
Step 1 – Download
Get a copy of the agent and deployment tool by navigating to Settings > Integrations > Pheidix -> Download section.

Step 2 – Setup
- Copy the token key.
- The key is automatically generated and allows the EXE to point to your environment.
- Do not share this installation key outside of your organization.
- Category
- A default category will allow devices to be synced to a specific category based on the device’s serial number and/or manufacturer/model. If it is found in Hector, it will automatically be assigned to the asset.
- You can also check “Use the Chassis Type field” so that the Chassis Type is used to create categories like Laptops, Desktops, Tablets, Servers and so on (when the asset doesn’t already exist).
- Location
- When importing new assets, the app needs a default location to store the assets before they are moved to their final destination. We recommend a location called Triage, which will help distinguish the imported devices from day to day activities.
- Fields
- You can select the fields you want to synchronize depending on your requirements.
- If there are additional fields you would like added, don’t hesitate to contact our support team.
Once you are finished, you can click on the Save button to finalize this portion of the setup guide.
Manual Deployment
After downloading the app, you can manually install it on an endpoint by double clicking the EXE file. Once the app is open, enter the token copied in the previous steps. This token is the same token that will be installed on all endpoints.
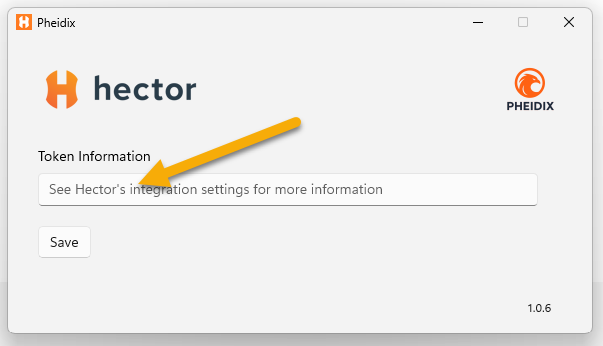
If there was an error with the token entered, Pheidix will display an error message. You can react accordingly to the error message, or contact our support team for more information.
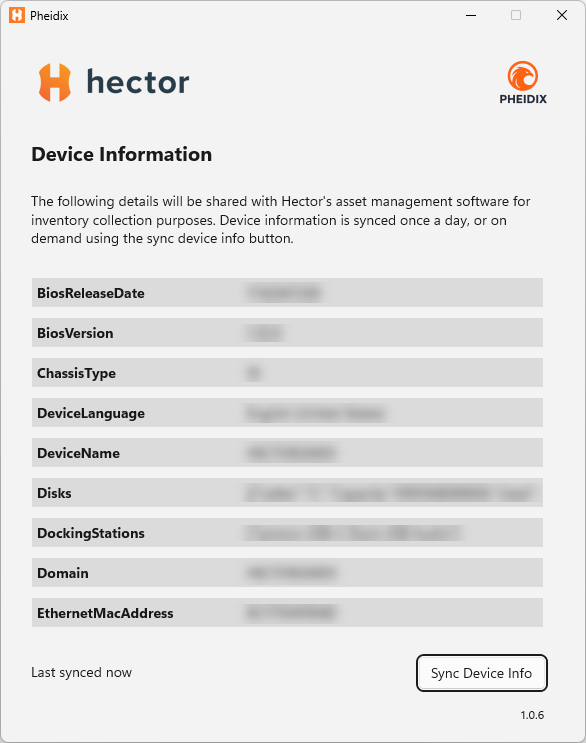
If everything worked correctly, you will see a list of properties and the information. You can choose to synchronize this information on demand, or leave the automatic synchronization which occurs every day or when the device is powered on.
Pheidix has a very low footprint and runs in the system tray. It is non invasive and most users will not know it’s installed or running. It needs access
Automated Deployment
If you are a system administrator, you can massively deploy Pheidix to thousands of machines using your existing management tooling (Microsoft Intune, SCCM/Configuration Manager, or Group Policy). All methods rely on the same two ingredients: the machine-wide installer and your environment’s token key.
What you deploy
For mass deployment, always use the machine-wide installer Hector.Pheidix-stable.msi. It installs to %ProgramFiles%\Hector.Pheidix\ for all users and requires elevation. (The Hector.Pheidix-stable-Setup.exe file is the per-user installer intended only for manual, single-machine installs — do not use it for fleet deployment.)
Your environment key is provisioned into a small machine-wide configuration file (%ProgramData%\Hector.Pheidix\settings.json) that the agent reads on first launch. The deployment script below creates that file, locks it down so standard users cannot tamper with it, installs the agent, and starts it in the signed-in user’s session — all in one silent pass. You only need to supply your key.
Step 1 — Host the files on a network share
Place both the MSI and the deployment script on a UNC path that target machines can read at boot time (e.g., \\Server\Deploy$). For Group Policy startup scripts, ensure Domain Computers have read access to the share.
Step 2 — Use this deployment script
Save the following as Deploy-Pheidix.ps1 alongside the MSI on your share. It is safe to run on every boot: if Pheidix is already installed, it exits immediately. Replace the key with the 6-character code from your Hector environment (Settings > Integrations > Pheidix), or pass it with the -Key parameter.
#Requires -RunAsAdministrator
param([Parameter(Mandatory)][string]$Key)

$installRoot = Join-Path $env:ProgramFiles "Hector.Pheidix"
# The app runs from the \current subfolder; this path is stable across self-updates.
$exe         = Join-Path $installRoot "current\Pheidix.exe"

# Idempotency guard - skip if already installed (safe for boot-time GPO). Update.exe lives
# in the install root and is the reliable marker that the agent is present.
if (Test-Path (Join-Path $installRoot "Update.exe")) { return }

$share    = Split-Path -Parent $MyInvocation.MyCommand.Path
$dataPath = Join-Path $env:ProgramData "Hector.Pheidix"

# 1. Provision the machine-wide, admin-only config BEFORE installing.
New-Item -ItemType Directory -Path $dataPath -Force | Out-Null
icacls $dataPath /inheritance:r /grant:r "SYSTEM:(OI)(CI)F" "BUILTIN\Administrators:(OI)(CI)F" "BUILTIN\Users:(OI)(CI)RX" | Out-Null
@{
    PheidixKey = $Key
    UpdatesUrl = "https://downloads.hctr.app/pheidix/win/"
} | ConvertTo-Json | Out-File (Join-Path $dataPath "settings.json") -Encoding utf8 -Force

# 2. Install machine-wide (to Program Files), silently.
$msi = Join-Path $share "Hector.Pheidix-stable.msi"
Start-Process msiexec -Wait -ArgumentList ('/i "{0}" /quiet /norestart VELOPACK_INSTALLDIR="{1}"' -f $msi, $installRoot)

# 3. Register the auto-update task (runs as SYSTEM; required for a machine-wide install to update).
$upAction    = New-ScheduledTaskAction -Execute $exe -Argument "--update"
$upStartup   = New-ScheduledTaskTrigger -AtStartup
$upStartup.Delay = "PT2M"
$upHourly    = New-ScheduledTaskTrigger -Once -At (Get-Date) -RepetitionInterval (New-TimeSpan -Hours 1) -RepetitionDuration (New-TimeSpan -Days 3650)
$upPrincipal = New-ScheduledTaskPrincipal -UserId "NT AUTHORITY\SYSTEM" -LogonType ServiceAccount -RunLevel Highest
$upSettings  = New-ScheduledTaskSettingsSet -StartWhenAvailable -MultipleInstances IgnoreNew -ExecutionTimeLimit (New-TimeSpan -Minutes 30) -AllowStartIfOnBatteries -DontStopIfGoingOnBatteries
Register-ScheduledTask -TaskName "Hector Pheidix Update" -Action $upAction -Trigger $upStartup,$upHourly -Principal $upPrincipal -Settings $upSettings -Force | Out-Null

# 4. Launch the agent in the signed-in user's session.
$loggedOnUser = (Get-CimInstance Win32_ComputerSystem).UserName
if ((Test-Path $exe) -and $loggedOnUser) {
    $taskName     = "Pheidix-FirstLaunch"
    $action       = New-ScheduledTaskAction -Execute $exe
    $principal    = New-ScheduledTaskPrincipal -UserId $loggedOnUser -LogonType Interactive -RunLevel Limited
    $taskSettings = New-ScheduledTaskSettingsSet -AllowStartIfOnBatteries -DontStopIfGoingOnBatteries
    Register-ScheduledTask -TaskName $taskName -Action $action -Principal $principal -Settings $taskSettings -Force | Out-Null
    Start-ScheduledTask -TaskName $taskName
    Start-Sleep -Seconds 3
    Unregister-ScheduledTask -TaskName $taskName -Confirm:$false
}
Step 3 — Target your machines
| Tool | How to deploy |
| Microsoft Intune | Package Hector.Pheidix-stable.msi and Deploy-Pheidix.ps1 as a Win32 app, assign it to your device groups, and set the install command to:powershell.exe -ExecutionPolicy Bypass -File Deploy-Pheidix.ps1 -Key "YOUR_KEY"Intune runs this as SYSTEM, which has the elevation the MSI requires. |
| SCCM / Configuration Manager | Create an Application or Package that runs Deploy-Pheidix.ps1 -Key "YOUR_KEY" silently against your device collections. |
| Group Policy (GPO) | Under Computer Configuration > Policies > Windows Settings > Scripts, add Deploy-Pheidix.ps1 as a Startup Script with the parameter -Key "YOUR_KEY". Use Computer Configuration (not User Configuration) so the machine-wide MSI installs correctly. |
Step 4 — Prerequisites and verification
- Ensure the agent’s signing certificate is trusted on your endpoints (see the Requirements section above).
- Allow outbound HTTPS (port 443) to Hector so the agent can report once per day. If you filter by destination, allowlist your Hector environment host.
- Verify at scale by watching the device count grow in the Pheidix dashboard, rather than checking machines individually.
- To spot-check a single machine, confirm the
Pheidix.exeprocess is running and that the device shows up in the Pheidix dashboard shortly after.
Updating the agent
The app is setup to automatically update itself whenever a new version is released by the Hector team. If a new version is detected, the app will download the new version, shutdown, update, and reopen. This step is seamless and users don’t need to do anything specific.
Recap
Within this guide, you’ve learned how to setup the Pheidix Agent to collect device information and synchronize it back to Hector. However, you don’t have to go at it alone! Our team is used to setting up integrations and we can help you avoid pitfalls by organizing workshops and explaining in detail how to correctly configure the agent to collect as much data as needed. Contact our sales team for more information or to plan your next workshop.