
Odysseus took ten years to find his way home, charting coastlines nobody had mapped along the way. Our Odysseus does the same for your network: it explores the IP ranges you give it, knocks politely on every door, and reports back what answers.
Odysseus runs on a single machine and finds the equipment that can never run an agent: printers, switches, routers, firewalls, access points, IP cameras, NAS units, VoIP phones and hypervisor hosts. Each device it identifies becomes an asset in Hector, kept up to date on every scan.
Limitations
- The discovery agent runs on the following operating systems:
- Windows 11
- Windows 10 (version 1809 or later)
- Windows Server 2019 and later
- The agent discovers IPv4 ranges. IPv6-only segments are not scanned.
- A device is only as detailed as what it is willing to share. Devices with SNMP disabled and no web interface may be reported with little more than an IP and MAC address.
- One agent covers the ranges it can reach over the network. Sites separated by a firewall that blocks discovery traffic need their own agent.
Deployment Requirements
- Have access to Hector’s Odysseus installer.
- Choose one Windows machine per site that stays powered on and signed in — a management workstation, a jump box or a utility server is ideal.
- Have local administrator rights on that machine for the installation.
- Have permission to authorize the agent’s discovery traffic on the network segments you want to inventory.
- Have permission to download and register the app’s certificate.
- The machine must have access to the Internet (port 443) to retrieve its configuration and report discovered devices.
- Know the IP ranges to scan, and have the read-only SNMP community configured on the equipment you want identified in detail.
Only one agent per IP range. Two agents scanning the same subnet report the same devices twice. Hector matches them to the same asset, so nothing is duplicated, but the second scan is wasted effort on your network.
Network Requirements
Odysseus identifies devices by combining several read-only probes. The more of them your network allows between the agent and the equipment, the richer the inventory:
- ICMP echo — the first knock on the door, used to decide whether an address is worth probing further.
- SNMP (UDP 161) — version 2c, read-only GET requests using the
publiccommunity. This is where model, serial number, firmware, location and contact usually come from, so it is the single most valuable protocol to allow. - TCP service probes — a connection test on 21, 22, 23, 53, 80, 161, 443, 445, 515, 631, 1900, 3389, 5353, 5985, 5986, 8080, 8443, 9100, 49152 and 62078. The combination of open ports helps classify the device.
- HTTP and HTTPS — the server banner and page title of a device’s web interface.
- NetBIOS (UDP 137), SSDP/UPnP (UDP 1900) and mDNS (UDP 5353) — name and device-type announcements.
- Outbound HTTPS (TCP 443) — from the agent to Hector, to fetch its configuration and post discovered devices.
Discovery is deliberately gentle: probes are short-lived, every request is read-only, and the agent never attempts to authenticate to a device. It does open many connections in a short window, so if your monitoring flags port scans, allow-list the agent’s IP address before the first run.
Security
- The executable is signed by a certificate to avoid tampering.
- The agent reads only. It sends SNMP GET requests, opens and closes TCP connections and reads public web banners; it never writes to, configures or authenticates against a discovered device.
- The agent runs with the least amount of privileges and makes no changes to the operating system or hardware of the machine it is installed on.
- Discovered devices are cached in a local database on the agent’s machine and transmitted to Hector over HTTPS, authenticated by the pairing key you generate in the integration.
- No credentials for your network equipment are stored in the agent. The only secret it holds is its own pairing key.
- Scan errors stay on the machine unless you opt in — see Error handling below.
Footprint
- Between scans the agent sits in the notification area and does nothing but count down to the next discovery.
- During a scan it probes up to 50 addresses at a time, so expect a brief, visible CPU and network burst rather than a constant load.
- A full class-C range typically completes in one to two minutes.
- Disk usage is roughly 250 Mb, plus a small local database that grows with the number of discovered devices.
Getting Started
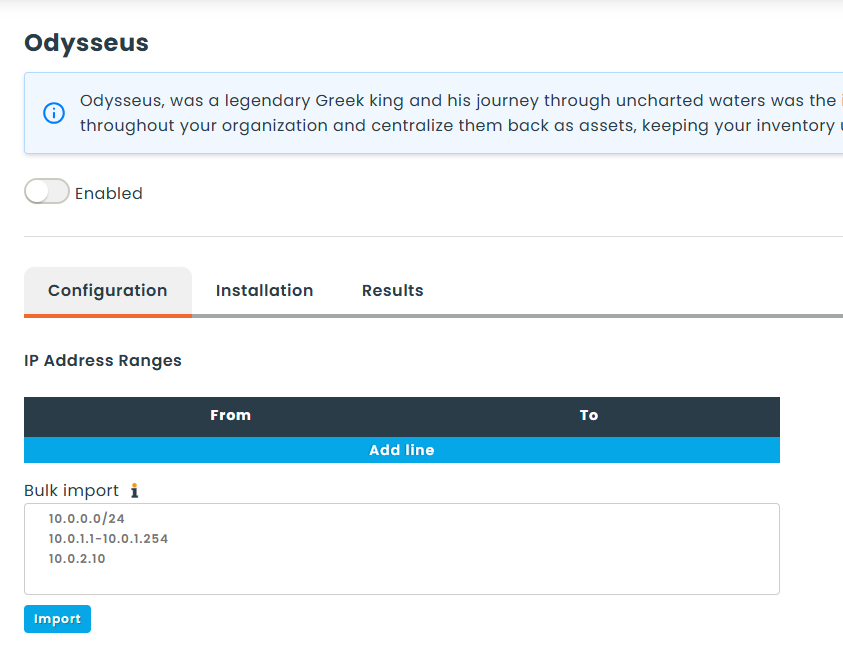
Add the Odysseus integration from Settings > Integrations, then open it. The integration has three tabs: Configuration for what to scan and when, Installation for the download and the pairing key, and Results for the history of past scans.
Step 1 – Download
Open the Installation tab and click Agent to download the installer. Keep it somewhere you can reach from the machine that will run the discovery.
Step 2 – Setup
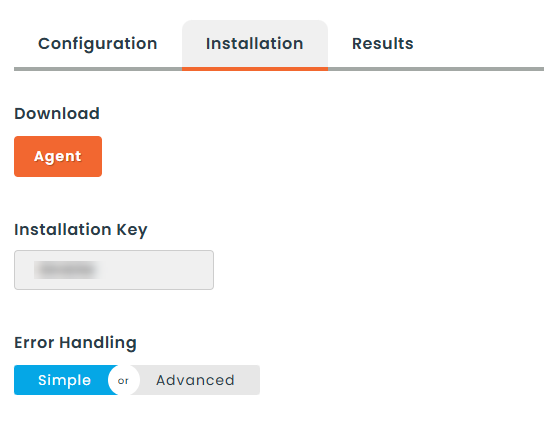
Configure the integration before you install the agent. The agent downloads this configuration the moment it is paired, so everything you set here is what the first scan will use.
Copy the installation key.
On the Installation tab, click the six-character installation key to copy it. This key pairs an agent with your Hector environment — treat it like a password, and keep it handy for the next step.
IP address ranges
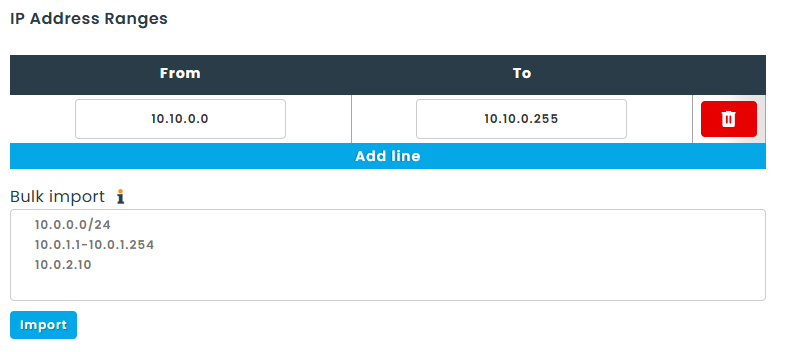
On the Configuration tab, list the ranges to explore. Add them one at a time with Add line, or paste a list into the mass import box — one subnet per line, written as a CIDR (10.0.0.0/24), a range (10.0.1.1-10.0.1.254) or a single address. The import tells you which lines it kept, which were already in the list, and which it could not read.
Scan only what you need. A /16 is 65,536 addresses and will keep the agent busy for a long time; several /24 ranges covering the subnets you actually use are faster and easier to read in the results.
Scan time and interval
Default scan time is the hour of the day, in the local time of the machine running the agent, when discovery starts. Leave Scan interval at 0 to scan once per day at that hour, or set a number of minutes to repeat through the day — the interval is counted from the end of one scan to the start of the next, so scans never overlap.
The agent must be running at the scheduled hour. A discovery missed because the machine was off is not caught up afterwards; the agent simply waits for the next scheduled time. This is why the agent belongs on a machine that stays on.
Category
Pick the category new assets are created in. Network equipment usually deserves its own category so the attributes Odysseus fills in are grouped where you expect them.
Location
Choose the stockroom discovered devices are placed in. If you want them routed automatically by IP range or another rule, set that up in the stockroom’s automation instead and use this as the fallback.
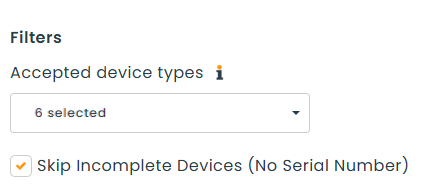
Filters
Accepted device types lists every type the agent can recognize — printers, switches, routers, firewalls, access points, IP cameras, NAS units, VoIP phones, hypervisor hosts and the generic network device types. Only the types you select are imported. Leave them all selected to accept everything, including any new type a future version of the agent learns to detect.
Skip incomplete devices skips anything discovered without a serial number. Turn it on when you want a clean asset list of identifiable equipment; leave it off when you would rather see everything on the network, including the devices that keep their serial number to themselves.
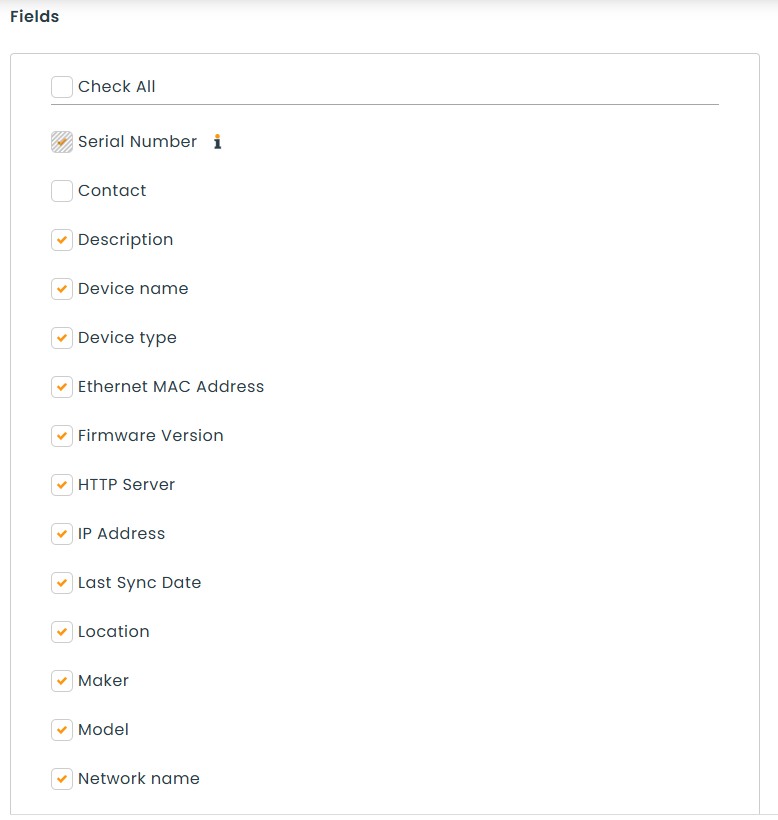
Fields
Select the information you want written onto the asset. Each field you tick becomes an attribute, created and kept up to date by the integration:
- Identity — Device Name, Serial Number, Maker, Model, Device Type
- Network — IP Address, Ethernet MAC Address, Network Name, Open Ports
- System — Operating System, Firmware Version, Description, Uptime, HTTP Server
- Context — Location, Contact, Last Sync Date
Description, Location, Contact and Uptime come from the device’s own SNMP configuration, so they are only as accurate as what your equipment reports. Last Sync Date records the last time the agent saw the device answer on the network — a quick way to spot equipment that has gone quiet.
Error handling
On the Installation tab, Simple keeps scan errors — an unreadable configuration, an IP range the agent cannot parse — in a log file on the machine running the agent. Advanced also sends them to Hector at the end of each scan so our support team can investigate with you. The number of errors is recorded in the scan history either way.
Manual Deployment
For most environments this is the whole job. Because a single agent covers a whole site, installing it by hand on the machine you picked takes a couple of minutes.
- Sign in to the machine that will run the discovery and launch the installer you downloaded.
- The agent starts and asks for an installation key. Paste the six-character key from the Installation tab and click Save.
- The agent contacts Hector, retrieves your configuration and lists the IP ranges it is now responsible for.
- Click Start Discovery to run the first scan immediately instead of waiting for the scheduled hour.
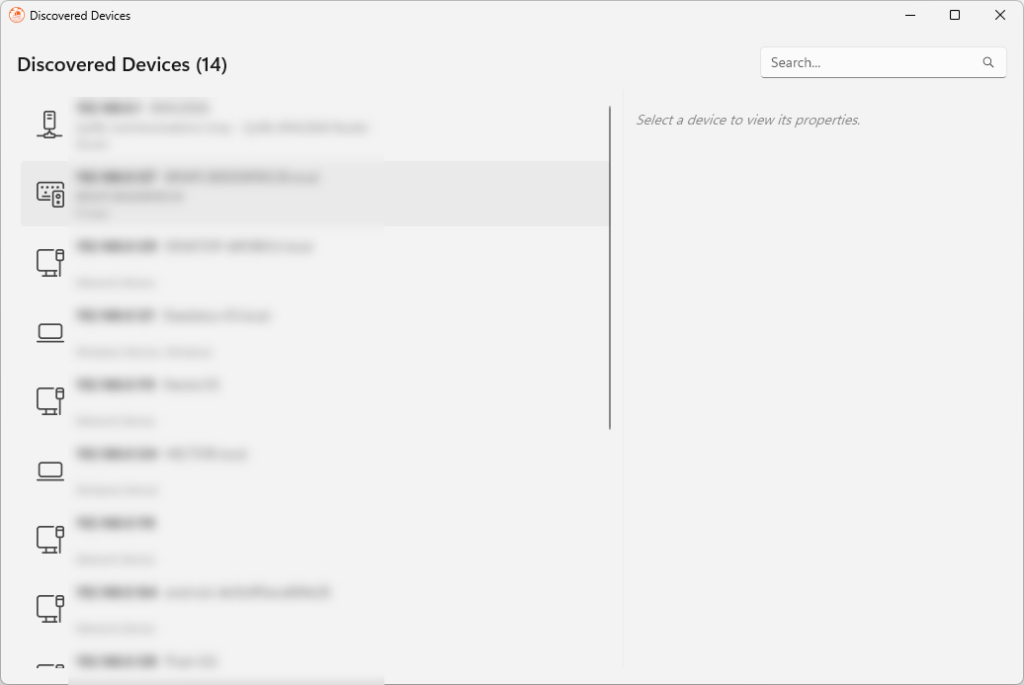
- When it finishes, click View Discovered Devices to see what it found, and check the assets in Hector.
If the key is rejected, check that it matches the integration exactly and that the machine can reach the Internet on port 443. The agent tells you which of the two failed.
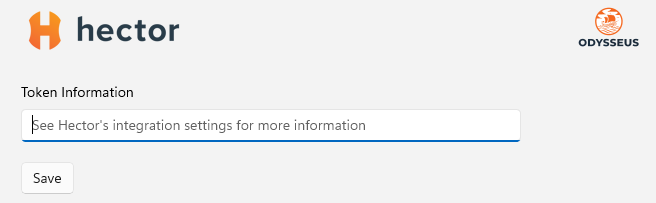
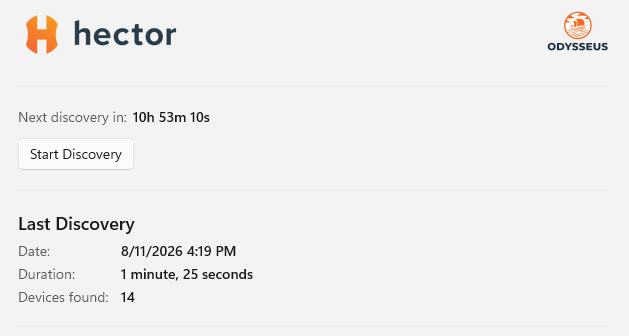
The agent lives in the notification area. Closing its window leaves it running; double-click the tray icon to bring it back, or use Exit in the tray menu to stop it. It starts with Windows and goes straight to the tray on subsequent sign-ins.
Automated Deployment
Rolling Odysseus out to many sites at once — a school board, a retail chain, a group of branch offices — is worth scripting. One agent per site, each paired with the same installation key.
What you deploy
A single setup executable. It installs the agent under the signed-in user’s local application data folder (%LOCALAPPDATA%\Hector.Odysseus), registers it to start with Windows, and needs no separate runtime. Keep that default location: installing to a machine-wide folder such as Program Files prevents the agent from updating itself.
Deploy in the context of the signed-in user, not as SYSTEM. A per-user install run as SYSTEM lands in the SYSTEM profile, where nobody will ever see the agent’s window and where its scheduled discovery will not run on sign-in.
Step 1 — Host the files on a network share
Copy the installer to a share every target machine can read, for example \\FILESERVER\Deploy\Odysseus\. Read access for the deploying user is enough.
Step 2 — Use this deployment script
# Installs the Odysseus agent and pairs it with your Hector environment.
# Run as the signed-in user on the machine that will scan the network.

$Share = "\\FILESERVER\Deploy\Odysseus"
$Setup = Join-Path $Share "Hector.Odysseus-stable-Setup.exe"
$Key   = "XXXXXX"   # the installation key from Settings > Integrations > Odysseus

$Agent = Join-Path $env:LOCALAPPDATA "Hector.Odysseus\current\Odysseus.exe"

# 1. Install silently if the agent is not there yet
if (-not (Test-Path $Agent)) {
    Start-Process $Setup -ArgumentList "--silent" -Wait
}

# 2. Start it with the installation key so it pairs without any prompt
Start-Process $Agent -ArgumentList "--key", $Key
To remove the agent later:
Stop-Process -Name "Odysseus" -ErrorAction SilentlyContinue
Start-Process "$env:LOCALAPPDATA\Hector.Odysseus\Update.exe" -ArgumentList "--uninstall", "--silent" -Wait
Step 3 — Target your machines
| Tool | How to deploy |
|---|---|
| Manual | Recommended for a handful of sites. One install per site, done in minutes, with the first scan verified on the spot. |
| Intune | Package the script as a Win32 app with install behaviour set to User, and assign it to the user who signs in to the collecting machine. |
| Configuration Manager (SCCM/MECM) | Deploy the script as an application to a user collection, not a device collection, so it runs in the user’s context. |
| Group Policy | Add the script as a user logon script, scoped to an OU or security group containing only the accounts on your collecting machines. |
Whichever tool you use, scope it tightly. Odysseus is not meant to land on every workstation — one agent per network segment is the whole design.
Step 4 — Prerequisites and verification
- The target machine can reach the Internet on port 443.
- The agent’s discovery traffic is allowed on the segments you listed in the integration.
- The agent appears in the notification area of the target machine.
- The Results tab of the integration shows a scan for that site.
- New assets appear in the category and stockroom you configured.
Updating the agent
The agent checks for a new version after each scan and updates itself in place, so there is nothing to redeploy. The version it is running is shown in the bottom corner of its window. Changing the configuration in Hector needs no update at all: click Refresh configuration in the agent, or wait for the next scan.
Reviewing what was found
The Results tab lists recent scans with their start and end time, status, the number of subnets scanned and the number of devices found. It is the fastest way to confirm that a site’s agent is still doing its rounds.
On the agent itself, View Discovered Devices opens the full inventory it holds locally, with every property it managed to read from each device — useful when you are wondering why a particular printer came through with less detail than its neighbour.
Recap
Configure the ranges, copy the key, install the agent on one machine per site, and let it explore. From there your network equipment maintains itself in Hector: new devices arrive as assets, existing ones stay current, and the ones that stop answering are easy to spot.
And you don’t have to go at it alone. If you would like a hand planning which ranges to scan or getting SNMP answering the way you want, reach out to our team — we do this every week.