Identifying your assets is essential for effective inventory management. In this guide, we show you how to design, customize, and generate your barcode/QR labels using Hector.
📖 Before you begin : Barcode trends : The future of inventory management
⚙️ Labels configuration
Your list of labels is available under Settings › Labels.
● Default labels
By default, Hector offers two label templates:
- Label template for subcategories
- Label template for assets

You can modify and customize these templates at any time to suit your needs.
● Custom labels
It is also possible to create your own labels from scratch. Here’s how it works :
Label preview
In the upper right corner of the label creation page, a preview of your label is available so you can view the results of your configurations. You can also use this preview to position the various elements (barcode, QR code, text, logo, image).

Details

1. Name : The name of your custom label.
2. Description : The description of your custom label.
3. Entity : Allows you to associate the label with one of the many entities in the software. This would allow you to create a label for your warehouses or users, for example.
4. Is default : Allows you to specify whether this is the default label for the entity. Only one default label can be defined per entity.
5. Unit of measure : Allows you to define the unit of measurement used for the label configuration (in mm or inches).
6. Note : A note to add more information about your custom label.
General

1. Type : Choose between a barcode, QR code, or blank label. You can also select a format for printing multiple labels:
- One per page : Recommended option when using a thermal printer.
- Letter/A4 : Recommended options when using a standard printer.
- LSL-POLY-MDA 51x25mm : Preconfigured format for printing label sheets.
- LSL-POLY-MDA 38x19mm : Preconfigured format for printing label sheets.
- LSL-POLY-MDA 64x25mm : Preconfigured format for printing label sheets.
2. Dimensions : Allows you to configure the dimensions of the label and the height of the barcode or QR code. If you choose to use a thermal printer, we invite you to consult our article on the key configurations to ensure optimal label printing.
3. Margins : Allows you to configure the margins (top, bottom, left, right) of the label.
Text

1. Format : Allows you to configure the size and alignment of the text.
2. Lines : Allows you to display or remove fields from the label and customize the display order.
Image

1. Use stockroom image : Displays the store image on the label (if applicable).
2. Use record image : Displays the record image on the label. For example, if it is a label linked to the Assets entity, the image of the asset for which you want to generate a label will be displayed.
3. Use organization logo (if no image) : Displays your organization’s logo on the label.
📖 Suggested reading : Choosing the right barcode or QR code labels
🖨️ Labels printing options
Below are the different options available for generating and printing your labels :
● Single printing
If you want to print a label for a single record, you have two options :
1. Entity records table
If you want to print a label for a specific record (an asset, for example), you can do so by going to the asset table and clicking on the actions menu for the asset in question :

2. Record card
A generic QR code that can be printed is available on each record’s card. This option can be enabled or disabled for each entity via the roles (settings › roles) :


It would also be possible to access and print your custom labels from the actions button on the record card :

● Multiple printing
If you want to print multiple labels in a single transaction, you have two options :
1. Multiple selection
If you want to print labels for multiple records in a single transaction (assets, for example), you can do so by going to the assets table, checking each desired asset and clicking the print button at the bottom of the page :

2. Print button for all records
You can also use the print button at the bottom right of each table. This button allows you to print the labels for all assets created on your platform in a single transaction, for example :

● Spontaneous printing module
This module allows you to customize and print your labels before creating your records in Hector. This means you can print your labels in advance, place them on each asset and then scan them to add these assets to your Hector inventory.

📖 Suggested reading : How to choose a barcode or QR code printer ?
⚡ Possible actions with label scanning
Once your barcode or QR code labels have been printed and placed on your assets, you can now scan them to perform several actions, such as :
- Searching for an asset in inventory
- Moving multiple assets from one location to another
- Removing assets from your inventory
- Adding and returning assets on a loan
- Adding assets to a requisition, transfer or work order
💡 Simplify and speed up your transactions by pairing your labels with the Iris module !
A barcode action sheet is also available in Hector to enable you to quickly enter data when adding assets or managing equipment loans :


📱 Tools for scanning labels
● With the web application
Wired or wireless scanner
The use of a scanner is recommended when your inventory is managed from a fixed workstation (from an office or at the loan desk, for example). Hector is compatible with any type of scanner sold on the market, whether wired or wireless.
📖 Suggested reading : Inventory Management with a barcode scanner
● With the mobile application
Using a mobile app is recommended when you want to increase mobility in managing your inventory (in a warehouse or from a construction site, for example). Hector’s mobile app is available for free on Android and iOS and can be downloaded on any mobile device (phone, tablet).
Here are two options for scanning your labels with Hector’s mobile app :
1. With the camera on your mobile device
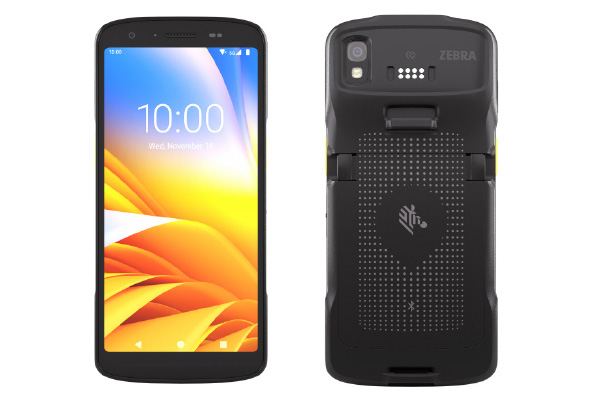
2. With a Zebra device : Hector’s mobile app is integrated with Zebra TC22/27 devices, which offer excellent scanning performance. This is also an option to consider if you want to avoid using employees’ personal mobile devices.
📖 Suggested reading : Why Choose an Inventory Management Software with a Mobile App and Barcodes ?
There you have it! You now have everything you need to start customizing and generating your barcode or QR code labels with Hector. If you have any questions or would like personalized assistance, please don’t hesitate to contact our sales team at [email protected] or your account manager.